
Composite materials are light and robust. These properties have led to an increase in their use in different industries. However, there is a lack of inspection methods that enable reliable inspection of composites cost-effectively. Active thermography is still a relatively unknown NDT technique, but new inspection systems demonstrate the high flexibility and effectiveness of this method. In the past few years, the use of composites has increased in many industries, particularly in aerospace and automotive. New generation aircraft are now made up of a large percentage of composite materials and the first models of mass produced cars with carbon fibre reinforced plastic (CFRP) passenger cabins are already being driven on our roads. Of course, the combination of stability and lightweight design represents an obvious advantage, but the use of composites means new challenges, too. For example, the until-now-commonly-used NDT-methods for composite materials (for example, Phased-Array ultrasound) require long inspection-times, which leads to rising costs for maintenance and repair work. Nevertheless, it is critical that NDT inspections are performed in accordance with the specified standards, because the consequences for unrepaired damages could not only lead to a loss of image, but in the worst case, also to endanger human life. The causes of defective components are varied and range from normal wear to impact damage. Other possible defect sources occur during production processes because even the smallest anomaly in the fibre structure can weaken the robustness of composites. The same applies to other kind of inner defects like cavities or detached bonding. However, it is not easy to detect these defects when usual procedures for non-destructive testing cannot be integrated into production lines because they are too bulky and work slowly.
Active thermography
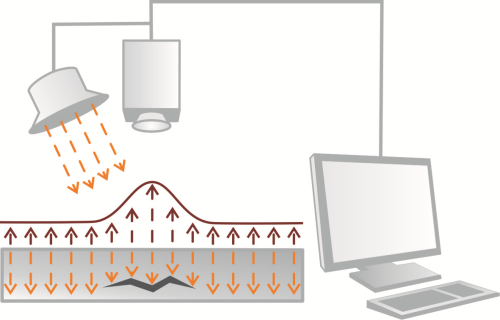
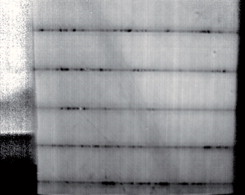
In order to facilitate fast and reliable check-ups, Automation Technology has developed a series of test-equipment based on the principle of active thermography. These systems do not only perform measurements within a few seconds, but they can also cover a relatively large area per inspection (for example, up to 1m²). Active thermography is therefore an effective NDT-method to meet the required performance of inspection work on composite materials within a reasonable economic framework. The principle of active thermography is based on the analysis of thermal flow that originates from the thermal excitation of an object. The propagation of thermal energy within the inspected material has a direct influence on the object’s surface temperature over time. This temperature development is recorded with the help of an infrared camera and analysed by special software. Through mathematical analysis the software calculates a result-image that enables the identification of the internal structure of the material, as well as possible defects in it. Until now active thermography systems were primarily for laboratory use. They were considered too complex for mobile applications or for their integration into production lines. However, with the development of new systems, such as the compact inspection head C-CheckIR Sensor, the thermographic NDT technique has gained entrance into these fields too.
Optical excitation
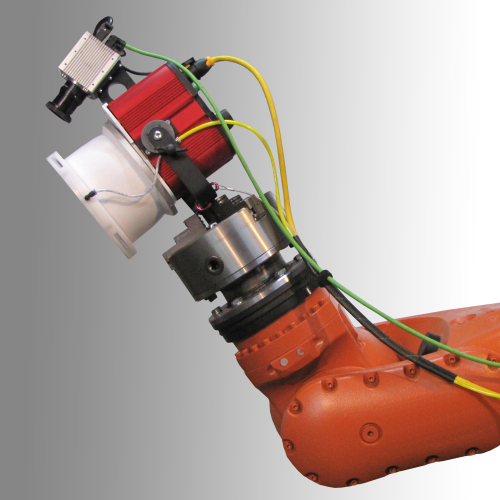
The measuring head consists of an optical excitation source with integrated control electronics and an uncooled infrared camera that has been specially developed for NDT applications. Therefore, its lightweight and compact design enables its easy integration into robotic arms or other supporting tools. A standard Ethernet cable connects the sensor head to the control computer (or laptop) where the analysis software processes the thermal images recorded by the infrared camera. This newly developed inspection head also forms the core component of the new thermographic NDT solution that has been designed for mobile use. For this purpose, the inspection head is mounted on a light support frame with three legs equipped with vacuum-driven suction cups. These suction cups enable the easy fixation of the measuring head to the surface of the object being inspected, which allows NDT inspections even on vertical surfaces. This new generation of compact active thermography system provides the flexibility that enables this technique to now be used in this market. The technique is not only suitable for the NDT inspection of different materials but also for the detection of a wide variety of defect-types, such as delamination, debonding, water inclusions and air cavities, for example. This assists not only in maintenance work, but also enables effective quality assurance inspections during production processes.
This article was published in the July/August 2014 issue of Reinforced Plastics magazine.
The digital edition of Reinforced Plastics is distributed free of charge to readers who meet our qualifying criteria. You can apply to receive your free copy by completing this short registration form.


